КАТЕГОРИИ:
Архитектура-(3434)Астрономия-(809)Биология-(7483)Биотехнологии-(1457)Военное дело-(14632)Высокие технологии-(1363)География-(913)Геология-(1438)Государство-(451)Демография-(1065)Дом-(47672)Журналистика и СМИ-(912)Изобретательство-(14524)Иностранные языки-(4268)Информатика-(17799)Искусство-(1338)История-(13644)Компьютеры-(11121)Косметика-(55)Кулинария-(373)Культура-(8427)Лингвистика-(374)Литература-(1642)Маркетинг-(23702)Математика-(16968)Машиностроение-(1700)Медицина-(12668)Менеджмент-(24684)Механика-(15423)Науковедение-(506)Образование-(11852)Охрана труда-(3308)Педагогика-(5571)Полиграфия-(1312)Политика-(7869)Право-(5454)Приборостроение-(1369)Программирование-(2801)Производство-(97182)Промышленность-(8706)Психология-(18388)Религия-(3217)Связь-(10668)Сельское хозяйство-(299)Социология-(6455)Спорт-(42831)Строительство-(4793)Торговля-(5050)Транспорт-(2929)Туризм-(1568)Физика-(3942)Философия-(17015)Финансы-(26596)Химия-(22929)Экология-(12095)Экономика-(9961)Электроника-(8441)Электротехника-(4623)Энергетика-(12629)Юриспруденция-(1492)Ядерная техника-(1748)
Creating a transition from the full clip to the foreground
|
|
|
|
You’ve separated the flamingo from the background. Now you’ll add other elements to the composition. First, you’ll create a transition from the full clip to the isolated flamingo.
1 Close the Layer panel, revealing the Composition panel.
2 Select the Project tab to bring the Project panel forward. Then drag the Flamingo.mov file from the Project panel to the Timeline panel, adding it to the bottom of the layer stack.
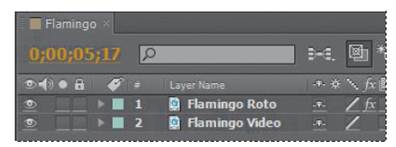
There are two Flamingo.mov layers in the Timeline panel. You’ll rename them to reduce confusion.
3 Select the second Flamingo.mov layer, and press Enter or Return. Rename the layer Flamingo Video, and press Enter or Return again. Rename theFlamingo.mov layer (the top layer) Flamingo Roto.
You want the full clip (the Flamingo Video layer) to be fully visible for the first 20 frames. Then you want it to dissolve over 15 frames.
4 Go to 0:20 in the time ruler.
5 Select the Flamingo Video layer, and then press the T key to reveal the Opacity property for the layer.
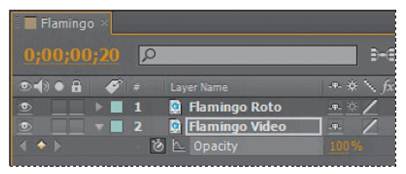
6 Click the stopwatch icon next to the Opacity property to create an initial keyframe.
7 Go to 1:05, and change the Opacity value to 0. After Effects creates another keyframe.

8 Move the current-time indicator from 0:15 to 1:05 to manually preview the background video fading.
You don’t need to run the Flamingo Video clip after it fades, so you’ll trim the layer.
9 Go to 1:10. Press Alt+] (Windows) or Option+](Mac OS) to trim the layer.
You want the isolated flamingo to move to the left side of the frame so that you can place text to its right. You’ll use Position keyframes to move the flamingo.
10 Select the Flamingo Roto layer, and then press the P key to reveal the Position property for the layer.
11 Go to 1:05, and click the stopwatch icon next to the Position property to create an initial keyframe.
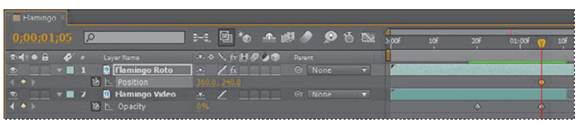
12 Go to 2:05, and change the Position value to 43.2, 240.
13 Click the Position property name to select all keyframes for the layer, and then choose Animation > Keyframe Assistant > Easy Ease.
14 Hide the properties for the Flamingo Roto and Flamingo Video layers, and save the file.
|
|
|
|
|
Дата добавления: 2014-11-20; Просмотров: 338; Нарушение авторских прав?; Мы поможем в написании вашей работы!