КАТЕГОРИИ:
Архитектура-(3434)Астрономия-(809)Биология-(7483)Биотехнологии-(1457)Военное дело-(14632)Высокие технологии-(1363)География-(913)Геология-(1438)Государство-(451)Демография-(1065)Дом-(47672)Журналистика и СМИ-(912)Изобретательство-(14524)Иностранные языки-(4268)Информатика-(17799)Искусство-(1338)История-(13644)Компьютеры-(11121)Косметика-(55)Кулинария-(373)Культура-(8427)Лингвистика-(374)Литература-(1642)Маркетинг-(23702)Математика-(16968)Машиностроение-(1700)Медицина-(12668)Менеджмент-(24684)Механика-(15423)Науковедение-(506)Образование-(11852)Охрана труда-(3308)Педагогика-(5571)Полиграфия-(1312)Политика-(7869)Право-(5454)Приборостроение-(1369)Программирование-(2801)Производство-(97182)Промышленность-(8706)Психология-(18388)Религия-(3217)Связь-(10668)Сельское хозяйство-(299)Социология-(6455)Спорт-(42831)Строительство-(4793)Торговля-(5050)Транспорт-(2929)Туризм-(1568)Физика-(3942)Философия-(17015)Финансы-(26596)Химия-(22929)Экология-(12095)Экономика-(9961)Электроника-(8441)Электротехника-(4623)Энергетика-(12629)Юриспруденция-(1492)Ядерная техника-(1748)
Using Track Matte to create a black silhouette
|
|
|
|
The logo contains a black silhouette of the flamingo. To create the silhouette, you’ll create a solid black layer and mask the layer to conform to the shape of the FlamingoRoto layer. However, when you do this, the Flamingo Roto layer won’t be visible.You’ll apply the Track Matte to a separate instance of the Flamingo Roto layer.
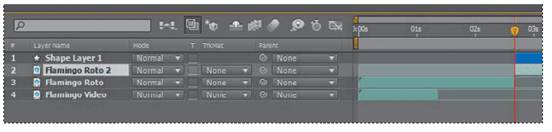
1 Select the Flamingo Roto layer, and press Ctrl+Shift+D (Windows) or Command+Shift+D (Mac OS) to split the layer. Flamingo Roto 2 appears above Flamingo Roto in the Timeline panel. The currenttime indicator was at 2:20 when you split the layer, so 2:20 becomes the Out point for Flamingo Roto and the In Point for Flamingo Roto 2. Splitting a layer is faster than duplicating a layer and then trimming the In and Out points for both layers.
2 Choose Layer > New > Solid.
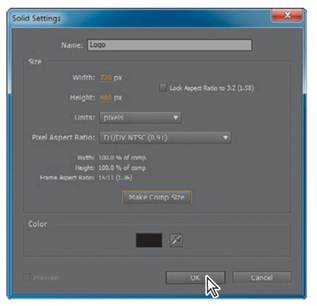
3 In the Solid Settings dialog box, name the solid Logo, click the Make Comp Size button, set the color to black, and click OK.
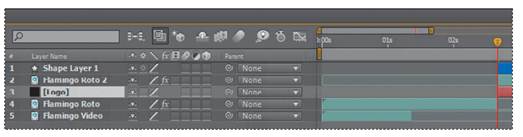
The Logo layer is added to the top of the layer stack in the Timeline panel.
4 Move the Logo layer below the Flamingo Roto 2 layer in the Timeline panel.
5 With the Logo layer selected, press Alt+[(Windows) or Option+[ (Mac OS) to make 2:20 the In Point for the layer. It becomes active at the same time as the Flamingo Roto 2 layer.
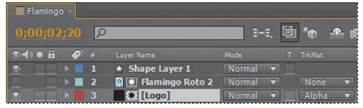
6 At the bottom of the Timeline panel, click the Toggle Switches/Modes button to display the Track Matte column.
7 On the Logo layer, choose Alpha Matte "Flamingo Roto 2" from the TrkMat pop-up menu. The flamingo becomes solid black.
The solid black is matched with the flamingo matte, but the flamingo extends outside the boundary border. You’ll mask the Logo layer.
8 Select the Rounded Rectangle tool in the Tools panel.
9 With the Logo layer selected, draw a mask in the same shape and position asthe border.
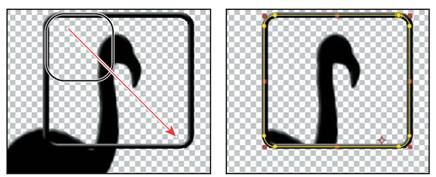
10 Right-click (Windows) or Control-click (Mac OS) the Logo layer, and choose Layer Styles > Bevel And Emboss. Use the default settings to match the bevel of the border.
You’ve created the company logo. Now you’ll precompose the layers you used in thelogo so you can freeze the entire logo in the next exercise.
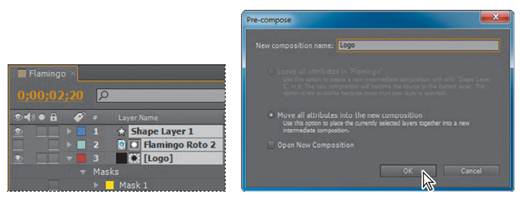
11 Select the Shape Layer 1, Flamingo Roto 2, and Logo layers in the Timeline panel. Then choose Layer > Pre-compose. Name the new composition Logo. Make sure Move All Attributes Into The New Composition is selected, and that Open New Composition isn’t selected. Then click OK.
12 Save your project.
Freezing a frame’s properties
You’ve created the logo, but the flamingo continues to move within the border as the clip progresses. You’ll freeze the logo so it stays consistent for the rest of the project, and then fade it into the logo.
1 Select the Logo layer, and go to 3:00.
At 3:00, the flamingo is in the position you want to use for the static logo.
2 Choose Layer > Time > Freeze Frame.
The rest of the time bar disappears in the Timeline panel; all that remains for the Logo layer is the freeze frame icon at 3:00.
|
|
|
Now, you’ll fade the full-color flamingo to the the black logo.
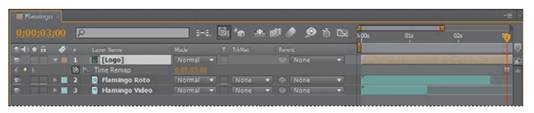
3 Move the Logo layer below the Flamingo Roto layer in the Timeline panel.
4 Select the Flamingo Roto layer, and drag the layer’s Out point to 3:00.
5 With the Flamingo Roto layer selected, press the T key to reveal the Opacity property for the layer.
6 Go to 2:20, and click the stopwatch icon () next to the Opacity property to create an initial keyframe.
7 Go to 3:00, and change the Opacity value to 0. After Effects adds a keyframe.
8 Select the Logo layer in the Timeline panel, and press the T key to reveal its Opacity property.
9 Click the stopwatch icon to set an initial keyframe. The Opacity should be 100%.
10 Move back to 2:20, and change the Opacity value to 0%.
The flamingo transitions from full-color, full-motion video to a solid, still logo.
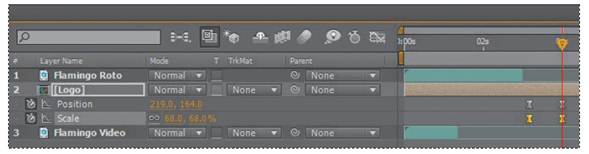
11 With the Logo layer still selected, go to 3:05. Press the P key to reveal the Position property for the layer; then hold the Shift key and press the S key toreveal the Scale property as well.
12 Set initial keyframes for both the Scale and Position properties.
13 Go to 4:00, and change the Position to 219, 164 and the Scale amount to 68 %.
14 Click the Position property for the Logo layer to select all its keyframes. Choose Animation > Keyframe Assistant > Easy Ease.
15 Repeat step 14 to add Easy Ease to the Scale keyframes.
16 Save the file.
|
|
|
|
|
Дата добавления: 2014-11-20; Просмотров: 372; Нарушение авторских прав?; Мы поможем в написании вашей работы!