КАТЕГОРИИ:
Архитектура-(3434)Астрономия-(809)Биология-(7483)Биотехнологии-(1457)Военное дело-(14632)Высокие технологии-(1363)География-(913)Геология-(1438)Государство-(451)Демография-(1065)Дом-(47672)Журналистика и СМИ-(912)Изобретательство-(14524)Иностранные языки-(4268)Информатика-(17799)Искусство-(1338)История-(13644)Компьютеры-(11121)Косметика-(55)Кулинария-(373)Культура-(8427)Лингвистика-(374)Литература-(1642)Маркетинг-(23702)Математика-(16968)Машиностроение-(1700)Медицина-(12668)Менеджмент-(24684)Механика-(15423)Науковедение-(506)Образование-(11852)Охрана труда-(3308)Педагогика-(5571)Полиграфия-(1312)Политика-(7869)Право-(5454)Приборостроение-(1369)Программирование-(2801)Производство-(97182)Промышленность-(8706)Психология-(18388)Религия-(3217)Связь-(10668)Сельское хозяйство-(299)Социология-(6455)Спорт-(42831)Строительство-(4793)Торговля-(5050)Транспорт-(2929)Туризм-(1568)Физика-(3942)Философия-(17015)Финансы-(26596)Химия-(22929)Экология-(12095)Экономика-(9961)Электроника-(8441)Электротехника-(4623)Энергетика-(12629)Юриспруденция-(1492)Ядерная техника-(1748)
Animating a camera
|
|
|
|
Adding an adjustment layer
A simple reflection is pretty good, but a blur would make it look more realistic. You’ll use an adjustment layer to apply a blur effect. Effects applied to an adjustment layer affect all the layers beneath it.
1 Choose Layer > New > Adjustment Layer. After Effects adds a new adjustment layer at the top of the layer stack.
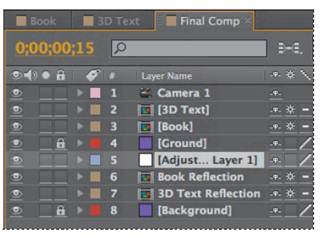
2 Move the Adjustment Layer 1 layer below the Ground layer in the Timeline panel. Moving the adjustment layer below the Ground layer ensures that it will affect only the reflection and Backdrop layers.
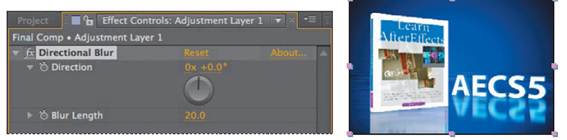
3 With the Adjustment Layer 1 layer selected, choose Effect > Blur & Sharpen > Directional Blur.
4 In the Effect Controls panel, change the Blur Length to 20. Leave the Direction setting at its default, as the reflections are perpendicular to the floor.
5 Lock the Adjustment Layer 1 layer to prevent any accidental changes to it.
6 Choose File > Save to save your work so far.
In Lesson 11, you created a camera layer, Camera 1. So far, that camera has been steady. Now, you’ll animate the camera, so that it begins far from the 3D objects and moves closer to them as the movie progresses.
1 Go to 4:00 in the Timeline panel. This is the point where the camera will come to rest, after it’s moved closer to the subject.
2 Select the Camera 1 layer in the Timeline panel, and press P to reveal its Position property.
3 Press the Shift key as you press A to reveal the Point Of Interest property for the Camera 1 layer as well.
4 Click the stopwatch icons for the Position and Point Of Interest properties to create keyframes for each.
You’ve set the keyframes for the end of the camera movement. Rather than starting the camera movement at the beginning of the time ruler, you’ll begin at 0:10, so that viewers have a moment to orient themselves before the camera begins to zoom in.
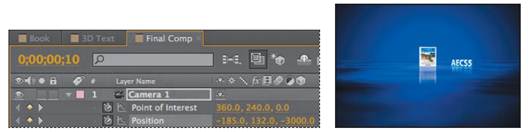
5 Go to 0:10 in the Timeline panel.
6 Change the Point Of Interest values to 360, 240, 0, and the Camera 1 Position values to -185, 132, -3000. Now the camera is much farther from the objects and the book is centered in its view.
7 Shift-click the Point Of Interest and Position property names to select all the keyframes for the layer, and then choose Animation > Keyframe Assistant > Easy Ease.
8 Press the spacebar to preview your work so far. Press the spacebar again to stop the preview.
9 Hide the Camera 1 layer properties.
|
|
|
|
|
Дата добавления: 2014-11-20; Просмотров: 364; Нарушение авторских прав?; Мы поможем в написании вашей работы!