КАТЕГОРИИ:
Архитектура-(3434)Астрономия-(809)Биология-(7483)Биотехнологии-(1457)Военное дело-(14632)Высокие технологии-(1363)География-(913)Геология-(1438)Государство-(451)Демография-(1065)Дом-(47672)Журналистика и СМИ-(912)Изобретательство-(14524)Иностранные языки-(4268)Информатика-(17799)Искусство-(1338)История-(13644)Компьютеры-(11121)Косметика-(55)Кулинария-(373)Культура-(8427)Лингвистика-(374)Литература-(1642)Маркетинг-(23702)Математика-(16968)Машиностроение-(1700)Медицина-(12668)Менеджмент-(24684)Механика-(15423)Науковедение-(506)Образование-(11852)Охрана труда-(3308)Педагогика-(5571)Полиграфия-(1312)Политика-(7869)Право-(5454)Приборостроение-(1369)Программирование-(2801)Производство-(97182)Промышленность-(8706)Психология-(18388)Религия-(3217)Связь-(10668)Сельское хозяйство-(299)Социология-(6455)Спорт-(42831)Строительство-(4793)Торговля-(5050)Транспорт-(2929)Туризм-(1568)Физика-(3942)Философия-(17015)Финансы-(26596)Химия-(22929)Экология-(12095)Экономика-(9961)Электроника-(8441)Электротехника-(4623)Энергетика-(12629)Юриспруденция-(1492)Ядерная техника-(1748)
Lesson overview. You can adjust 3D rotation two ways: by changing a layer’s Orientation values, or by changing its X
|
|
|
|
USING 3D FEATURES
Laboratory work 12
Review answers
Review Questions
About 3D rotation
You can adjust 3D rotation two ways: by changing a layer’s Orientation values, or by changing its X, Y, and Z Rotation values. You can use the Rotation tool to change any of these values.
When you animate any of a 3D layer’s Orientation values, the layer moves along the shortest possible rotational path in 3D space, creating natural and predictable rotations. You can smooth this path by changing the spatial keyframe interpolation to Auto Bezier.
When you animate any of a 3D layer’s X, Y, or Z Rotation values, the layer rotates along each individual axis. You can adjust the number of rotations as well as the angle of rotation. You can also add keyframes to the layer’s rotation on each axis individually. Animating these properties allows for more alternatives for fine control with keyframes and expressions than animating with the Orientation property, but also may result in motion that is less predictable. The individual Rotation properties are useful for creating rotations with multiple revolutions along a single axis.
1 What happens to a layer when you select its 3D Layer switch?
2 Why is it important to look at multiple views of a composition that contains 3D layers?
3 What happens when you move a layer’s Anchor Point values in the Timeline panel?
4 What is a camera layer?
1 When you select a layer’s 3D Layer switch in the Timeline panel, After Effects adds a third axis, the z axis, to the layer. You can then move and rotate the layer in three dimensions. In addition, the layer takes on new properties that are unique to 3D layers, such as the Material Options property group.
2 The appearance of 3D layers can be deceptive, depending on the view in the Composition panel. By enabling 3D views, you can see the true position of a layer relative to other layers in the composition.
3 When you adjust the Anchor Point values for a layer in the Timeline panel, the layer moves in the Composition panel even though its Position values remain the same.
4 You can view After Effects 3D layers from any number of angles and distances using layers called cameras. When you set a camera view for your composition, you look at the layers as though you were looking through that camera. You can choose between viewing a composition through the active camera or through a named, custom camera. If you have not created a custom camera, then the active camera is the same as the default composition view.
In this lesson, you’ll learn how to do the following:
Animate 3D objects.
Add reflections to 3D objects.
Use an adjustment layer to blur multiple layers.
Animate a camera layer.
Create and position light layers.
Add a Linear Wipe effect to reveal objects in the composition.
This lesson will take approximately an hour to complete. Copy the Lesson12 folder into the Lessons folder that you created on your hard drive for these projects (or create it now), if you haven’t already done so. As you work on this lesson, you’ll preserve the start files. If you need to restore the start files, copy them from the Adobe After Effects CS5 Classroom in a Book DVD.
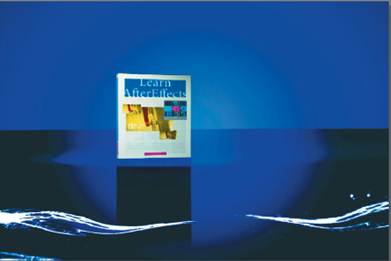
In Lesson 11, you created 3D objects and positioned them in a virtual world. Animation, lights, adjustment layers, and animated cameras complete the composition.
|
|
|
|
|
Дата добавления: 2014-11-20; Просмотров: 455; Нарушение авторских прав?; Мы поможем в написании вашей работы!