КАТЕГОРИИ:
Архитектура-(3434)Астрономия-(809)Биология-(7483)Биотехнологии-(1457)Военное дело-(14632)Высокие технологии-(1363)География-(913)Геология-(1438)Государство-(451)Демография-(1065)Дом-(47672)Журналистика и СМИ-(912)Изобретательство-(14524)Иностранные языки-(4268)Информатика-(17799)Искусство-(1338)История-(13644)Компьютеры-(11121)Косметика-(55)Кулинария-(373)Культура-(8427)Лингвистика-(374)Литература-(1642)Маркетинг-(23702)Математика-(16968)Машиностроение-(1700)Медицина-(12668)Менеджмент-(24684)Механика-(15423)Науковедение-(506)Образование-(11852)Охрана труда-(3308)Педагогика-(5571)Полиграфия-(1312)Политика-(7869)Право-(5454)Приборостроение-(1369)Программирование-(2801)Производство-(97182)Промышленность-(8706)Психология-(18388)Религия-(3217)Связь-(10668)Сельское хозяйство-(299)Социология-(6455)Спорт-(42831)Строительство-(4793)Торговля-(5050)Транспорт-(2929)Туризм-(1568)Физика-(3942)Философия-(17015)Финансы-(26596)Химия-(22929)Экология-(12095)Экономика-(9961)Электроника-(8441)Электротехника-(4623)Энергетика-(12629)Юриспруденция-(1492)Ядерная техника-(1748)
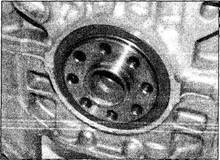
Renewal. B . until the outer edge of the seal is flush with the engine block
|
|
|
|
Check
B... until the outer edge of the seal is flush with the engine block

2 During the check, the engine must be raised slightly to remove the weight from the mountings.
3 Raise the vehicle and support it securely on axle stands (see Jacking and vehicle support), then position a jack under the engine oil sump.
Place a large wood block between the jack head and the oil sump, then carefully raise the engine just enough to take the weight off the mountings. Do not position the wood block under the drain plug.
Warning: DO NOT place any part of your body under the engine when it's supported only by a jack.

4 Check the mountings to see if the rubber
is cracked, hardened or separated from the metal plates. Sometimes the rubber will split right down the centre.
5 Check for relative movement between the mounting plates and the engine or body (use a large screwdriver or pry bar to attempt to move the mountings). If movement is noted, lower the engine and tighten the mounting fasteners.
6 Rubber preservative should be applied to the mountings to slow deterioration.
7 Raise the vehicle and support it securely on axle stands (if not already done). Support the engine as described in paragraph 3.
8 To remove the right engine mounting, remove the two nuts from underneath, one bolt from above, and the upper section will separate from the engine bracket.
9 Remove the mounting-to-chassis nuts and detach the mounting.
10 To remove the rear engine mounting, pull the rubber plugs from the longitudinal chassis brace to access the two nuts.
11 To remove the front engine mounting, remove the two nuts retaining the insulator to the longitudinal chassis brace, then the three nuts retaining the insulator to the chassis.
12 Refitting is the reverse of removal. Use thread-locking compound on the mounting bolts/nuts and be sure to tighten them securely.
2B•1
Chapter 2 Part B:
Engine removal and overhaul procedures
|
|
|
|
|
Дата добавления: 2014-12-23; Просмотров: 411; Нарушение авторских прав?; Мы поможем в написании вашей работы!