КАТЕГОРИИ:
Архитектура-(3434)Астрономия-(809)Биология-(7483)Биотехнологии-(1457)Военное дело-(14632)Высокие технологии-(1363)География-(913)Геология-(1438)Государство-(451)Демография-(1065)Дом-(47672)Журналистика и СМИ-(912)Изобретательство-(14524)Иностранные языки-(4268)Информатика-(17799)Искусство-(1338)История-(13644)Компьютеры-(11121)Косметика-(55)Кулинария-(373)Культура-(8427)Лингвистика-(374)Литература-(1642)Маркетинг-(23702)Математика-(16968)Машиностроение-(1700)Медицина-(12668)Менеджмент-(24684)Механика-(15423)Науковедение-(506)Образование-(11852)Охрана труда-(3308)Педагогика-(5571)Полиграфия-(1312)Политика-(7869)Право-(5454)Приборостроение-(1369)Программирование-(2801)Производство-(97182)Промышленность-(8706)Психология-(18388)Религия-(3217)Связь-(10668)Сельское хозяйство-(299)Социология-(6455)Спорт-(42831)Строительство-(4793)Торговля-(5050)Транспорт-(2929)Туризм-(1568)Физика-(3942)Философия-(17015)Финансы-(26596)Химия-(22929)Экология-(12095)Экономика-(9961)Электроника-(8441)Электротехника-(4623)Энергетика-(12629)Юриспруденция-(1492)Ядерная техника-(1748)
Creating a light layer
|
|
|
|
Using 3D lights
Adjusting layer timing
Earlier, you animated the 3D text and set it to arrive at 0:13. But with the book centered at the beginning of the movie, the animated text will be more effective if it arrives much later. You’ll move it now.
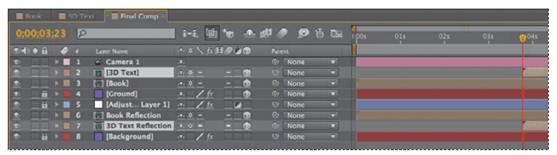
1 Go to 3:23 in the time ruler. This is just before the camera reaches its resting point, so there will be some overlap in movement as the text comes in.
2 Select the 3D Text layer in the Timeline panel, and then press Ctrl (Windows) or Command (Mac) as you select the 3D Text Reflection layer as well.
3 Press the [ (left bracket) key to move the In point for both layers to the current time.
4 Press the Home key, or move the current-time indicator to the beginning of the time ruler. Then press the spacebar to preview the animation. When you’ve finished watching the animation, press the spacebar again to stop the preview.
The composition is looking good so far. Adding lighting will give the scene depth and make it more dramatic.
In After Effects, a light is a type of layer that shines light on other layers. You can choose from among four different types of lights—Parallel, Spot, Point, and Ambient—and modify them with various settings. Lights, by default, point to a point of interest, just as camera layers do.
1 Press the Home key, or move the current-time indicator to the beginning of the time ruler.
2 Choose Layer > New > Light.
3 In the Light Settings dialog box, do the following:
Name the layer Spotlight.
Choose Spot from the Light Type menu.
Set Intensity to 100% and Cone Angle to 90˚.
Set Cone Feather to 50%, and set the Color to a light yellow (255, 255, 230).
Select the Casts Shadows option.
Make sure Shadow Darkness is set to 100%, and set Shadow Diffusion to 20 pixels.
Click OK to create the light layer.

The light layer is represented by a light bulb icon () in the Timeline panel, and the point of interest appears in the Composition panel as a cross-hair icon ().
|
|
|
|
|
Дата добавления: 2014-11-20; Просмотров: 447; Нарушение авторских прав?; Мы поможем в написании вашей работы!