КАТЕГОРИИ:
Архитектура-(3434)Астрономия-(809)Биология-(7483)Биотехнологии-(1457)Военное дело-(14632)Высокие технологии-(1363)География-(913)Геология-(1438)Государство-(451)Демография-(1065)Дом-(47672)Журналистика и СМИ-(912)Изобретательство-(14524)Иностранные языки-(4268)Информатика-(17799)Искусство-(1338)История-(13644)Компьютеры-(11121)Косметика-(55)Кулинария-(373)Культура-(8427)Лингвистика-(374)Литература-(1642)Маркетинг-(23702)Математика-(16968)Машиностроение-(1700)Медицина-(12668)Менеджмент-(24684)Механика-(15423)Науковедение-(506)Образование-(11852)Охрана труда-(3308)Педагогика-(5571)Полиграфия-(1312)Политика-(7869)Право-(5454)Приборостроение-(1369)Программирование-(2801)Производство-(97182)Промышленность-(8706)Психология-(18388)Религия-(3217)Связь-(10668)Сельское хозяйство-(299)Социология-(6455)Спорт-(42831)Строительство-(4793)Торговля-(5050)Транспорт-(2929)Туризм-(1568)Физика-(3942)Философия-(17015)Финансы-(26596)Химия-(22929)Экология-(12095)Экономика-(9961)Электроника-(8441)Электротехника-(4623)Энергетика-(12629)Юриспруденция-(1492)Ядерная техника-(1748)
Every 16 000 km or 12 months. Hinge and lock lubricati
|
|
|
|
VVT-i models -
Every 15 000 km or 12 months
Non-VVT-i models -
Every 16 000 km or 12 months
VVT-i models -
Every 15 000 km or 12 months
Non-VVT-i models -
Hinge and lock lubrication
1 Work around the vehicle, and lubricate the
hinges of the bonnet, doors and tailgate with a small amount of general-purpose oil.
2 Lightly lubricate the bonnet release mechanism and exposed section of inner cable with a smear of grease.
3 Check carefully the security and operation of all hinges, latches and locks, adjusting them where required. Check the operation of the central locking system (if fitted).
4 Check the condition and operation of the tailgate struts, renewing them if either is leaking or no longer able to support the tailgate securely when raised.
7 Automatic transmission/ differential fluid level check

Automatictransmission
1 The transmission should be at normal operating temperature. Set the selector lever in the Park position, making sure the vehicle is parked on a level surface.
2 Start the engine and allow it to idle. With your foot on the brake pedal, move the selector lever through all the positions, then return it to Park.
3 Pull out the transmission oil level dipstick, and wipe it clean (see illustration).
4 Fully insert the dipstick, then pull it out again. The level should be within the two notches either side of the HOT mark on the dipstick (see illustration). If not, add fluid and check again.
5 Check the condition of the fluid. If it smells burnt or is blackened, the fluid must be renewed as follows.
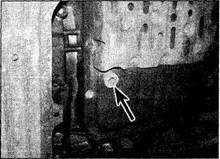
6 Stop the engine, jack up the front of the vehicle and support it securely on axle stands (see Jacking and vehicle support). Place a suitable container under the transmission drain plug.
7 Using an Allen (hexagonal) key, unscrew the drain plug and allow the fluid to drain into the container (see illustration). When all the fluid has drained, refit the plug, tightening it to the specified torque.
8 Fill the transmission through the dipstick aperture with the correct quantity of specified fluid, and check the level as previously described.
|
|
|
|
|
Дата добавления: 2014-12-23; Просмотров: 467; Нарушение авторских прав?; Мы поможем в написании вашей работы!