КАТЕГОРИИ:
Архитектура-(3434)Астрономия-(809)Биология-(7483)Биотехнологии-(1457)Военное дело-(14632)Высокие технологии-(1363)География-(913)Геология-(1438)Государство-(451)Демография-(1065)Дом-(47672)Журналистика и СМИ-(912)Изобретательство-(14524)Иностранные языки-(4268)Информатика-(17799)Искусство-(1338)История-(13644)Компьютеры-(11121)Косметика-(55)Кулинария-(373)Культура-(8427)Лингвистика-(374)Литература-(1642)Маркетинг-(23702)Математика-(16968)Машиностроение-(1700)Медицина-(12668)Менеджмент-(24684)Механика-(15423)Науковедение-(506)Образование-(11852)Охрана труда-(3308)Педагогика-(5571)Полиграфия-(1312)Политика-(7869)Право-(5454)Приборостроение-(1369)Программирование-(2801)Производство-(97182)Промышленность-(8706)Психология-(18388)Религия-(3217)Связь-(10668)Сельское хозяйство-(299)Социология-(6455)Спорт-(42831)Строительство-(4793)Торговля-(5050)Транспорт-(2929)Туризм-(1568)Физика-(3942)Философия-(17015)Финансы-(26596)Химия-(22929)Экология-(12095)Экономика-(9961)Электроника-(8441)Электротехника-(4623)Энергетика-(12629)Юриспруденция-(1492)Ядерная техника-(1748)
Lighting system elec
|
|
|
|
L-14
LIGHTING SYSTEM ELEC
LIGHTING SYSTEM ELEC
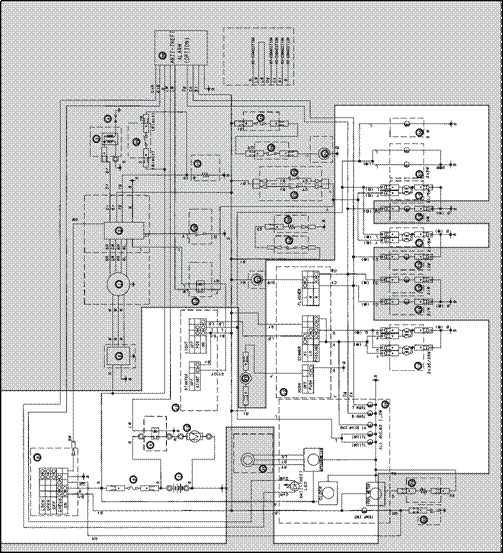
CIRCUIT DIAGRAM
L-13
 LIGHTING SYSTEM
5 Main switch
6 Main fuse
7 Battery
11 Lights switch
12 Dimmer switch
13 Headlight
17/19 Rear auxiliary light
25 Meter lights
36 Licence plate light
37 Front auxiliary light
2. 
 Install
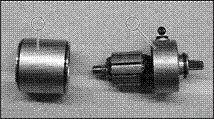
a b • Rotor
• Armature coil
NOTE:
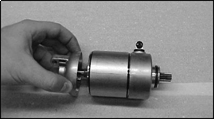
Align the mark §a of the coil with the slot §b on the bracket

3.  Install:
• Rear bracket
 5 Nm (0.5 m•kg)
NOTE:
•  Apply molybdenum grease lightly on to the bearings of the starter motor.
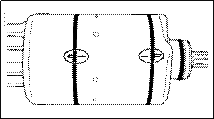
• Align the match marks on the yoke with the match on the brackets.

TROUBLESHOOTING +
 IF THE HEADLIGHT, HIGH BEAM, INDICATOR LIGHT, TAILLIGHT, MARKER LIGHT AND/OR METER LIGHT FAIL TO COME ON.
Procedure
Check:
1. Fuse - (main) 4. Lights switch
2. Battery 5. Dimmer switch
3. Main switch 6. Wiring connection (entire lighting system)
NOTE:
Remove the following parts before trouble shooting
1. Battery cover 3. Upper front panel 5. Seat and compartment 7. Rear panel
2. Front fairing 4. Handlebar panel 6. Handle 8. Side covers Use the following special tool in this troubleshooting section
 Pocket tester: 90890 - 03112
5. Dimmer switch/Pass switch
Refer to “CHECKING SWITCHES”
section
6. Wiring connection
• Check the connection of the entire lighting system.
Refer to “WIRING DIAGRAM”

•  Check the condition of each of the lighting system’s circuits.
Refer to “LIGHTING SYSTEM CHECK”
NO CONTINUITY
Replace the left handlebar switch
POOR CONNECTIONS
Correct

1.  Fuse
Fuse
Refer to “CHECKING SWITCHES”
section.
CONTINUITY
2.  Battery
• Check the battery condition
Refer to the “BATTERY INSPECTION” section in CHAPTER 3.
CORRECT
3. 
 Main switch
Refer to “CHECKING SWITCHES”
section.
NO CONTINUITY
Replace the fuse
INCORRECT
• Clean battery terminals
• Recharge or replace battery
NO CONTINUITY
Replace the main switch
LIGHTING SYSTEM CHECK
1. If the headlight and the high beam indicator light fail to come on.
1. Bulb and bulb socket
Refer to “CHECKING SWITCHES”
section
CONTINUITY
NO CONTINUITY
Replace the bulb and/or bulb socket
|
 4. Lights switch
Refer to “CHECKING SWITCHES”
section
NO CONTINUITY


 CONTINUITY
+
Replace the right handlebar switch
|
|
|
|
|
Дата добавления: 2014-12-23; Просмотров: 394; Нарушение авторских прав?; Мы поможем в написании вашей работы!