КАТЕГОРИИ:
Архитектура-(3434)Астрономия-(809)Биология-(7483)Биотехнологии-(1457)Военное дело-(14632)Высокие технологии-(1363)География-(913)Геология-(1438)Государство-(451)Демография-(1065)Дом-(47672)Журналистика и СМИ-(912)Изобретательство-(14524)Иностранные языки-(4268)Информатика-(17799)Искусство-(1338)История-(13644)Компьютеры-(11121)Косметика-(55)Кулинария-(373)Культура-(8427)Лингвистика-(374)Литература-(1642)Маркетинг-(23702)Математика-(16968)Машиностроение-(1700)Медицина-(12668)Менеджмент-(24684)Механика-(15423)Науковедение-(506)Образование-(11852)Охрана труда-(3308)Педагогика-(5571)Полиграфия-(1312)Политика-(7869)Право-(5454)Приборостроение-(1369)Программирование-(2801)Производство-(97182)Промышленность-(8706)Психология-(18388)Религия-(3217)Связь-(10668)Сельское хозяйство-(299)Социология-(6455)Спорт-(42831)Строительство-(4793)Торговля-(5050)Транспорт-(2929)Туризм-(1568)Физика-(3942)Философия-(17015)Финансы-(26596)Химия-(22929)Экология-(12095)Экономика-(9961)Электроника-(8441)Электротехника-(4623)Энергетика-(12629)Юриспруденция-(1492)Ядерная техника-(1748)
Adding a background image
|
|
|
|
You could dissolve to a transparent background, but for this project, you’ll add a peacock image as the final visual component.
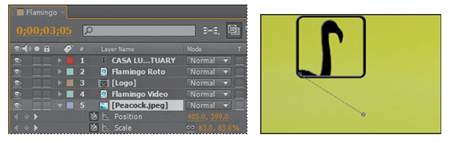
1 Drag the Peacock.jpeg element from the Project panel into the Timeline panel, placing it at the bottom of the layer stack.
2 Press the P key to reveal the Position property for the layer, and change the Position value to 405, 399.
3 Press the Shift key and the S key to reveal the Scale property as well. Change the Scale amount to 83 %.
4 Go to 3:05. Create initial keyframes for both the Scale and Position properties.
5 Move to 4:00. Change the Scale amount to 45 % and the Position value to 153, 240.
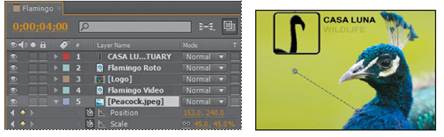
6 Select the Position property to select both keyframes. Right-click (Windows) or Control-click (Mac OS) one of the keyframes, and choose Keyframe Assistant > Easy Ease.
7 Select the Scale property to select both keyframes. Right-click (Windows) or Control-click (Mac OS) one of the keyframes, and choose Keyframe Assistant > Easy Ease.
Easy Ease makes movement more natural-looking. So does motion blur, so you’ll add that now.
8 Click the Toggle Switches/Modes button at the bottom of the Timeline panel. Then select the Motion Blur switch () for every layer except the Flamingo Video layer.
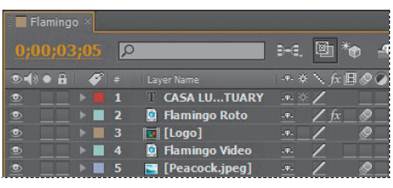
The Flamingo Video layer doesn’t need motion blur because it doesn’t move.
9 Select the Motion Blur For All Layers button to enable motion blur.
10 Hide any properties that are open for any layer.
|
|
|
|
|
Дата добавления: 2014-11-20; Просмотров: 435; Нарушение авторских прав?; Мы поможем в написании вашей работы!