КАТЕГОРИИ:
Архитектура-(3434)Астрономия-(809)Биология-(7483)Биотехнологии-(1457)Военное дело-(14632)Высокие технологии-(1363)География-(913)Геология-(1438)Государство-(451)Демография-(1065)Дом-(47672)Журналистика и СМИ-(912)Изобретательство-(14524)Иностранные языки-(4268)Информатика-(17799)Искусство-(1338)История-(13644)Компьютеры-(11121)Косметика-(55)Кулинария-(373)Культура-(8427)Лингвистика-(374)Литература-(1642)Маркетинг-(23702)Математика-(16968)Машиностроение-(1700)Медицина-(12668)Менеджмент-(24684)Механика-(15423)Науковедение-(506)Образование-(11852)Охрана труда-(3308)Педагогика-(5571)Полиграфия-(1312)Политика-(7869)Право-(5454)Приборостроение-(1369)Программирование-(2801)Производство-(97182)Промышленность-(8706)Психология-(18388)Религия-(3217)Связь-(10668)Сельское хозяйство-(299)Социология-(6455)Спорт-(42831)Строительство-(4793)Торговля-(5050)Транспорт-(2929)Туризм-(1568)Физика-(3942)Философия-(17015)Финансы-(26596)Химия-(22929)Экология-(12095)Экономика-(9961)Электроника-(8441)Электротехника-(4623)Энергетика-(12629)Юриспруденция-(1492)Ядерная техника-(1748)
Adding solid layers to a 3D object
|
|
|
|
You’ve assembled the front cover, back cover, and spine of the book. But it’s still lacking a top and right side (opposite the spine). Because these sides don’t require specific content, you can create them using solid layers.
1 Click in the Timeline panel. Then press Ctrl+Y (Windows) or Command+Y (Mac OS) to create a new solid layer.
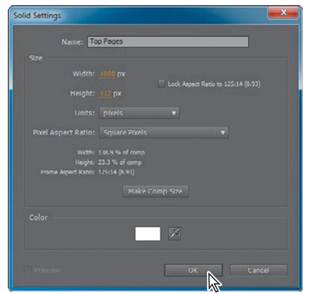
2 In the Solid Settings dialog box, name the layer TopPages, change the width to 1000 pixels (to match the cover width), and the height to 112 pixels (to match the width of the spine).
3 Click the eyedropper, and click a white area of the bookcover to sample it. Click OK to create the layer.
4 Select the 3D Layer switch () for the Top Pages layer.
5 Press R to display the Rotation properties, and change the X Rotation property to 90 degrees.
6 Press P to display the Position property. Click the y-axis value, and type 240- 1234. Press Enter or Return to accept the calculation.
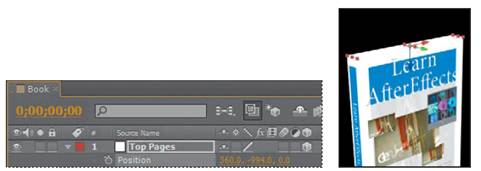
Why those numbers? The current position is 240, and you want to move it up the height of the book, which is 1234 pixels.
7 Press Ctrl+Y (Windows) or Command+Y (Mac OS) to create another solid layer for the right side of the book, representing the edges of the pages that are bound by the spine on the left side.
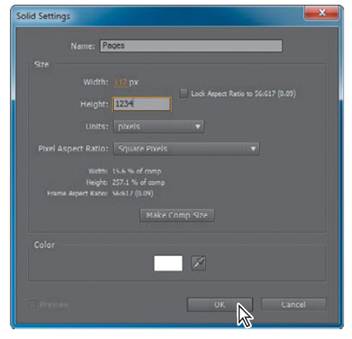
8 In the Solid Settings dialog box, name the layer Pages, change the Width to 112 pixels (the width of the spine) and the Height to 1234 pixels (the height of the covers). Make sure the layer is white, and then click OK.
9 Select the 3D Layer switch () for the Pages layer. The Pages layer needs to be on the right side of the book. You’ll change its Anchor Point, Rotation, and Position properties to get it there.
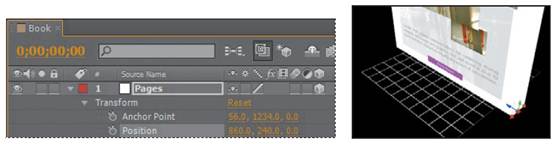
10 Ctrl-click (Windows) or Command-click (Mac OS) the triangle next to the Label column for the Pages layer to display all its Transform properties.
_ Note: For this project, it’s unlikely that anyone will see the bottom of the book. But if you want to add a bottom layer, duplicate the top layer and move it into position.
11 Change the y-axis value for the Anchor Point property to 1234 (placing the layer on the virtual floor); change the Y Rotation amount to 90 ° to make it face the right direction; and change the x-axis value for the Position property to 360+500 to move the layer to the right side of the book.
12 With the Timeline panel active, press Ctrl+A (Windows) or Command+A (Mac OS) to select all the layers. Then press the U key to close all the properties for the layers.
_ Tip: Pressing the U key multiple times cycles through the reveal/hide options.
|
|
|
|
|
Дата добавления: 2014-11-20; Просмотров: 443; Нарушение авторских прав?; Мы поможем в написании вашей работы!