КАТЕГОРИИ:
Архитектура-(3434)Астрономия-(809)Биология-(7483)Биотехнологии-(1457)Военное дело-(14632)Высокие технологии-(1363)География-(913)Геология-(1438)Государство-(451)Демография-(1065)Дом-(47672)Журналистика и СМИ-(912)Изобретательство-(14524)Иностранные языки-(4268)Информатика-(17799)Искусство-(1338)История-(13644)Компьютеры-(11121)Косметика-(55)Кулинария-(373)Культура-(8427)Лингвистика-(374)Литература-(1642)Маркетинг-(23702)Математика-(16968)Машиностроение-(1700)Медицина-(12668)Менеджмент-(24684)Механика-(15423)Науковедение-(506)Образование-(11852)Охрана труда-(3308)Педагогика-(5571)Полиграфия-(1312)Политика-(7869)Право-(5454)Приборостроение-(1369)Программирование-(2801)Производство-(97182)Промышленность-(8706)Психология-(18388)Религия-(3217)Связь-(10668)Сельское хозяйство-(299)Социология-(6455)Спорт-(42831)Строительство-(4793)Торговля-(5050)Транспорт-(2929)Туризм-(1568)Физика-(3942)Философия-(17015)Финансы-(26596)Химия-(22929)Экология-(12095)Экономика-(9961)Электроника-(8441)Электротехника-(4623)Энергетика-(12629)Юриспруденция-(1492)Ядерная техника-(1748)
Creating a guide layer
Using 3D views
Sometimes the appearance of 3D layers can be deceptive. For example, a layer might appear to be scaling smaller along its x and y axes when it’s actually moving along the z axis. You can’t always tell from the default view in the Composition panel. The Select View Layout pop-up menu at the bottom of the Composition panel lets you divide the panel into different views of a single frame, so you can see your work from multiple angles. You specify the different views using the 3D View pop-up menu.
1 At the bottom of the Composition panel, click the Select View Layout pop-up menu, and choose 2 Views – Horizontal. The left side of the Composition panel displays the Top view of the frame, and the right side displays the Active Camera view, which you’ve been viewing.
2 Click in the left side of the Composition panel to make the Top view active. Orange corner tabs appear around the active view.
3 Choose Custom View 1 from the 3D View pop-up menu at the bottom of the panel.

In the Custom View 1 window, you can see that the layer is a grid that can offer true perspective in 3D space.
4 Hide the properties for the 3D Grid layer in the Timeline panel.
5 Choose File > Save to save your work so far.
Guide layers help you position and edit elements in the Composition panel. For example, you can use guide layers for visual reference, audio timing, timecode reference, or even to store comments to yourself. In this project, you want to use the 3D Grid layer to help you place objects, but you don’t want to render it in the final artwork. You’ll convert it to a guide layer and lock it to ensure it stays in place.
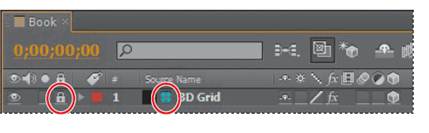
1 Select the 3D Grid layer in the Timeline panel, and choose Layer > Guide Layer. A cyan grid appears next to the layer name in the Timeline panel to indicate that it’s a guide layer.
2 Select the Lock switch () for the 3D Grid layer in the Timeline panel to lock the layer.
|
|
Дата добавления: 2014-11-20; Просмотров: 429; Нарушение авторских прав?; Мы поможем в написании вашей работы!